
Raspberry Pi Adventure - Day 2
One of the nice things about the Pi, is how small it is, meaning it’s easy to find a spot for it to live, well you could if it wasn’t for those pesky cables.
That’s why I opted for wifi over ethernet. The next target on my cable hit list was HDMI, which we can get rid of by making our Pi accessible via VNC.
Static IP Addresses
Before I go in to how to set-up VNC, there is one thing we need to do, set-up a static IP for our Raspberry Pi.
The reason - so that when you come to logging into a VNC session on your desktop you only ever need to remember / save one IP Address.
Router
The way I set-up my home network is that specific bits of hardware are given a static IP.
I do it this way because I find it simple.
However, it will vary from one router to the next as to how you do it, so I would look up how to do it for your specific router.
Static from Pi
There is another way of giving your Pi a static IP address, which is to alter the configuration on the Pi.
If this is a more suitable option for you, then check out ModMyPi’s Tutorial.
VNC with TightVNC
This post is a culmination of these two fantastic posts:
- http://gettingstartedwithraspberrypi.tumblr.com/post/24142374137/setting-up-a-vnc-server
- http://www.raspberrypi.org/phpBB3/viewtopic.php?t=7395
First off, install tightvncserver.
sudo apt-get install tightvncserver
Run tightvncserver and set up a password as well as a read only password if you want to, I didn’t.
pi@raspberrypi ~ $ tightvncserver

You will require a password to access your desktops.

Password:
Warning: password truncated to the length of 8.
Verify:

Would you like to enter a view-only password (y/n)? n
New 'X' desktop is raspberrypi:1
Creating default startup script /home/pi/.vnc/xstartup Starting applications specified in /home/pi/.vnc/xstartup
Log file is /home/pi/.vnc/raspberrypi:1.log
After this, we need to kill the tightvncserver and start a new VNC session with some additional parameters, like so.
tightvncserver -kill :1
vncserver :1 -geometry 1920x1080 -depth 24
According to various sources, the Raspberry Pi can output at a maximum of 1920x1080 resolution for VNC, but if you want to customise it to something smaller, that’s the place to do it.
The :1 is the port number you will add to the IP Address of your Raspberry Pi whenever you want to log in to VNC.
I use Ubuntu on my desktop, so will be using Remmina to connect to the VNC Session. For Windows and OS X users, try RealVNC Viewer: http://www.realvnc.com/download/viewer/
For the Ubuntu folks in the room:
sudo apt-get install remmina
Note: I chose Remmina as it has a better UI for creating, saving and editing connections compared other apps.
When it comes to connecting from your computer, you’ll need the IP address of your Raspberry Pi, which you can find by opening a terminal on your Pi and running ifconfig.
ifconfig
eth0
    Link encap:Ethernet HWaddr b8:27:eb:7f:a7:ea
    UP BROADCAST MULTICAST MTU:1500 Metric:1
    RX packets:0 errors:0 dropped:0 overruns:0 frame:0
    TX packets:0 errors:0 dropped:0 overruns:0 carrier:0
    collisions:0 txqueuelen:1000
    RX bytes:0 (0.0 B) TX bytes:0 (0.0 B)
lo
    Link encap:Local Loopback
    inet addr:127.0.0.1 Mask:255.0.0.0
    UP LOOPBACK RUNNING MTU:65536 Metric:1
    RX packets:8 errors:0 dropped:0 overruns:0 frame:0
    TX packets:8 errors:0 dropped:0 overruns:0 carrier:0
    collisions:0 txqueuelen:0
    RX bytes:1104 (1.0 KiB) TX bytes:1104 (1.0 KiB)
wlan0
    Link encap:Ethernet HWaddr 00:87:31:13:3a:1a
    inet addr:192.168.0.123
    Bcast:192.168.0.255 Mask:255.255.255.0
    UP BROADCAST RUNNING MULTICAST MTU:1500 Metric:1
    RX packets:6693 errors:0 dropped:1 overruns:0 frame:0
    TX packets:1868 errors:0 dropped:0 overruns:0 carrier:0
    collisions:0 txqueuelen:1000
    RX bytes:7657876 (7.3 MiB)
    TX bytes:166684 (162.7 KiB)
From this we can enter fill in the settings for the VNC program.
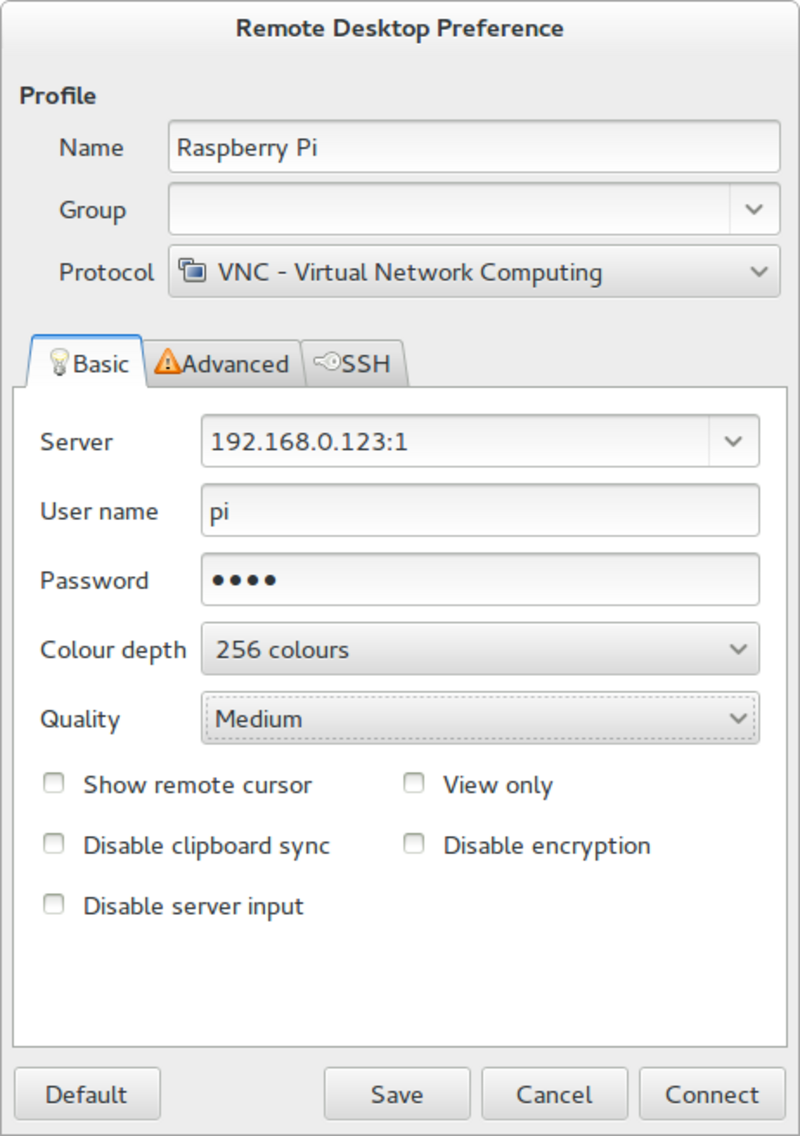
When we connect, we should be set up with our Raspberry Pi VNC session :)

Start-Up
Now that we have it up and running, we want to ensure this runs on start-up.
Firstly, reboot your Pi so we know there won’t be any VNC servers running.
sudo reboot
Open a terminal and enter the following command to create a start up and shut down script:
sudo nano /etc/init.d/tightvncserver
Add the following, making sure to add your appropriate screen size.
#! /bin/sh
### BEGIN INIT INFO
# Provides:                  tightvncserver
# Required-Start:        $syslog
# Required-Stop:         $syslog
# Default-Start:            2 3 4 5
# Default-Stop:            0 1 6
# Short-Description:   VNC Server Script
# Description:             Add VNC Server to boot and shutdown sequence
#
### END INIT INFO

# Carry out specific functions when asked to by the system
case "$1" in
start)
    su pi -c '/usr/bin/vncserver :1 -geometry 1920x1080 -depth 24'
    echo "Starting VNC server "
    ;;
stop)
    pkill Xtightvnc
    echo "VNC Server has been stopped (didn't double check though)"
    ;;
*)
    echo "Usage: /etc/init.d/blah {start|stop}"
    exit 1
    ;;
esac

exit 0
Then press ctrl+x and type y to exit and save the file.
Make the script executable with:
sudo chmod +x /etc/init.d/tightvncserver
Next step is to check the script is working
sudo /etc/init.d/tightvncserver start
You should be able to connect to a VNC session after you’ve run this command.
Finally, add it to the boot and shut down sequence.
cd /etc/init.d/
sudo update-rc.d tightvncserver defaults
That’s VNC sorted.
SFTP
The next thing I wanted to do was be able to pull / send a file to the Pi.
I think Raspbian comes with openssh-server installed by default, which means all you need to do is connect over SFTP and you should be able to swap files.
These instructions are how to connect from Gnome Ubuntu, if you are on OS X, I would strongly recommend trying Cyberduck or using Finders network support. For Windows, Filezilla is the best option I am aware. I haven’t tried these options, but I’m fairly sure they should work.
First, we open up our chosen app to connect over SFTP.

We’ll be asked to input the URL to our server (the IP Address of our Pi in this case).

After you’ve entered the IP address, you’ll be asked for a username and password, the username is the one you’ve been using to log in to your Raspberry Pi (i.e. pi by default) and the password is the password you use for logging into the Raspberry Pi (i.e. the one you used when you first set-up Raspbian).

And we are done :)

Found an issue?
All my posts are available to edit on GitHub, any fix is greatly appreciated!